Wednesday, July 3, 2013

The Pattern Overlay: An instructional How-To

Oh goodness! I haven't been to a lot of the websites I used to frequent since I found a full time job and ran out of time for a lot of my hobbies. I get some free time today and decide to log into a few various ones and come across all sorts of messages from people wanting to get in touch with me and figure out how I did this! I'm so incredibly flattered!! ...And beyond embarrassed that some of them are over 2 years old. *blushes* I'm so sorry!

I mentioned briefly in my first post on this blog about what I did but I will try to go into a little bit more detail here so that it's more readily available should people try to find it in the future.

Okay so here, we go. Remember back when you were a kid and coloring books had those pages where you could copy a picture using a grid? Kinda like this one:


That is pretty much essentially it... lol.

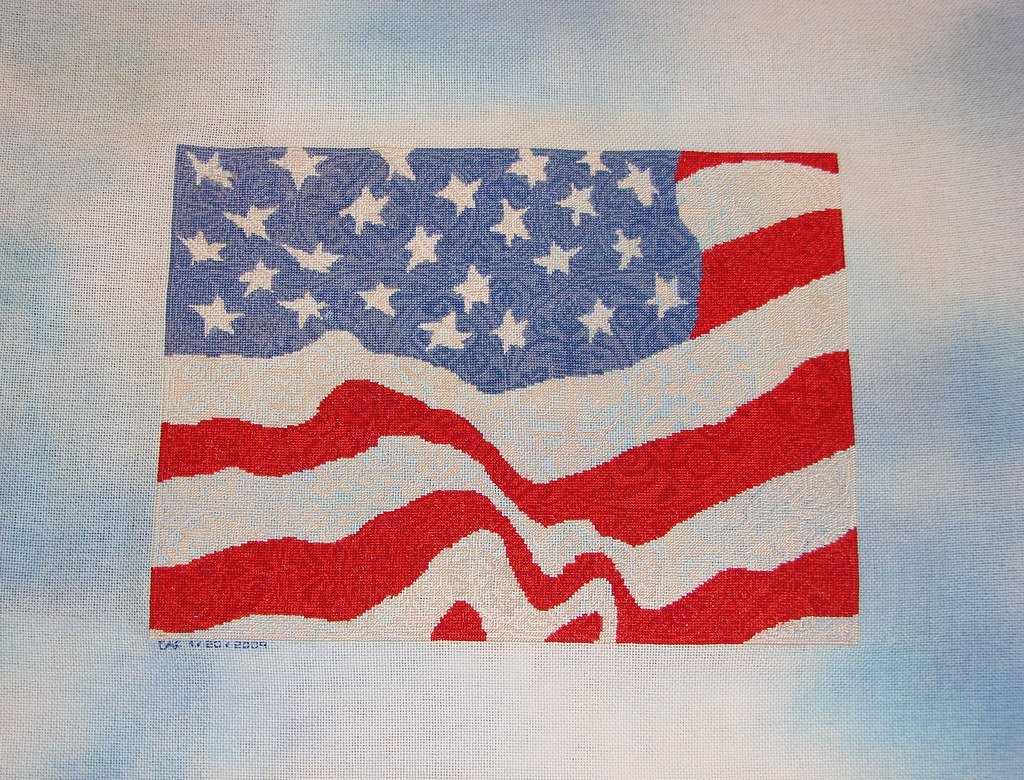
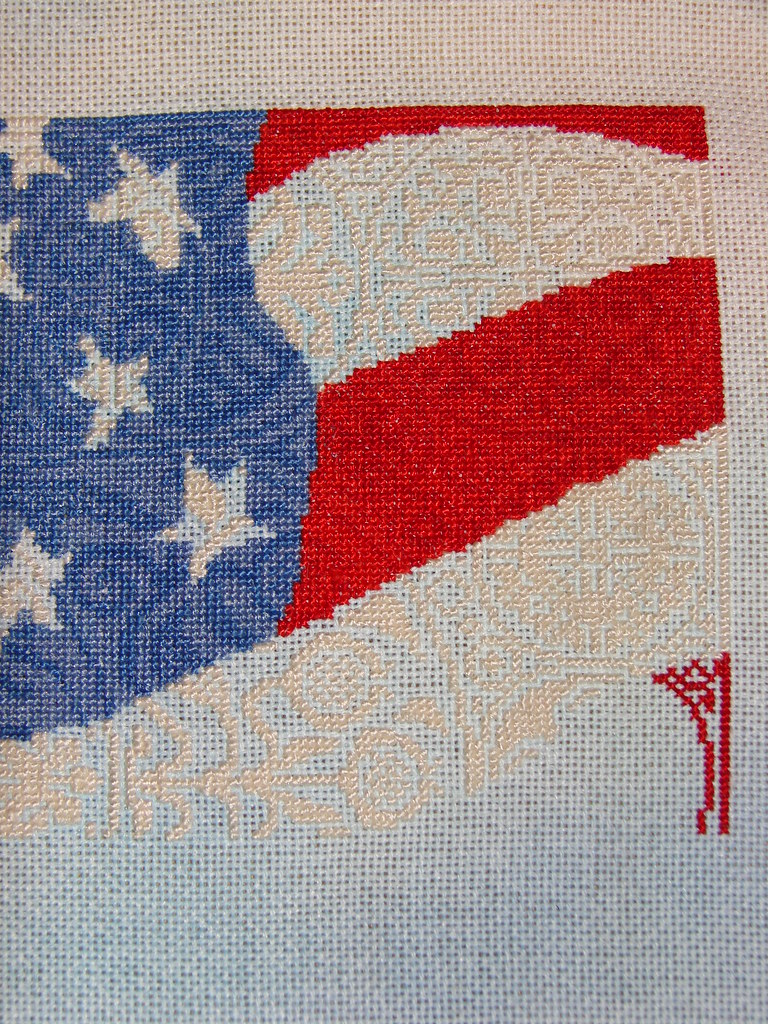
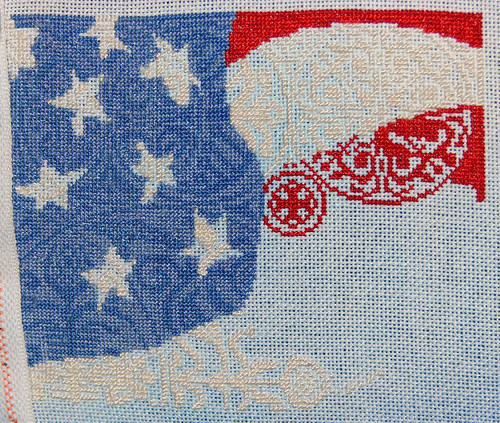
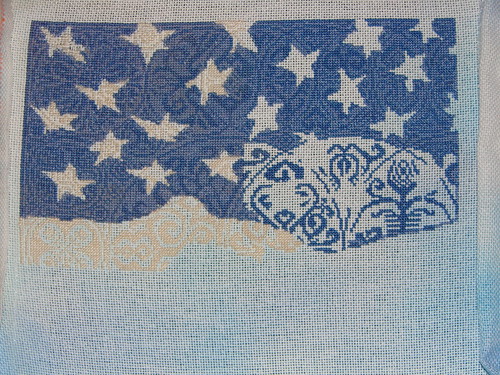
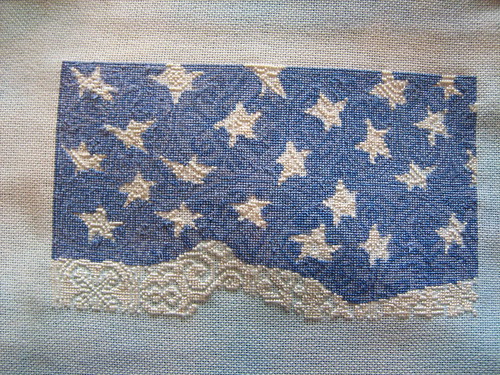
I found a photo of a waving flag through the ever-handy google and played around with my printer, enlarging/cropping it to get it to print out the correct size. The CdC pattern from InkCircles comes with a final page that shows the full cross-stitch design minimized so it all fits on one page. It allows you to see how the pages of the pattern are connected to create the whole image and is pretty much an essential part to transforming the pattern. That is the page that I started with. I made a couple of copies of that page so that I wouldn't be scribbling all over the original.

Once I had my copied CdC final page and my flag page, I sat them both side-by-side, grabbed my ruler and drew out a grid onto both. Then I copied the simple lines from the flag drawing over to the final page.

After finishing drawing out my flag onto the new final page, I then took copies of each individual pattern page (the full-sized ones with the actual pattern on them -- again with a few personal copies to preserve the original pattern) and matched up the lines I had drawn onto those pages. The final page from CdC is quite handy in showing the general pattern to follow and it was really easy to draw them out.

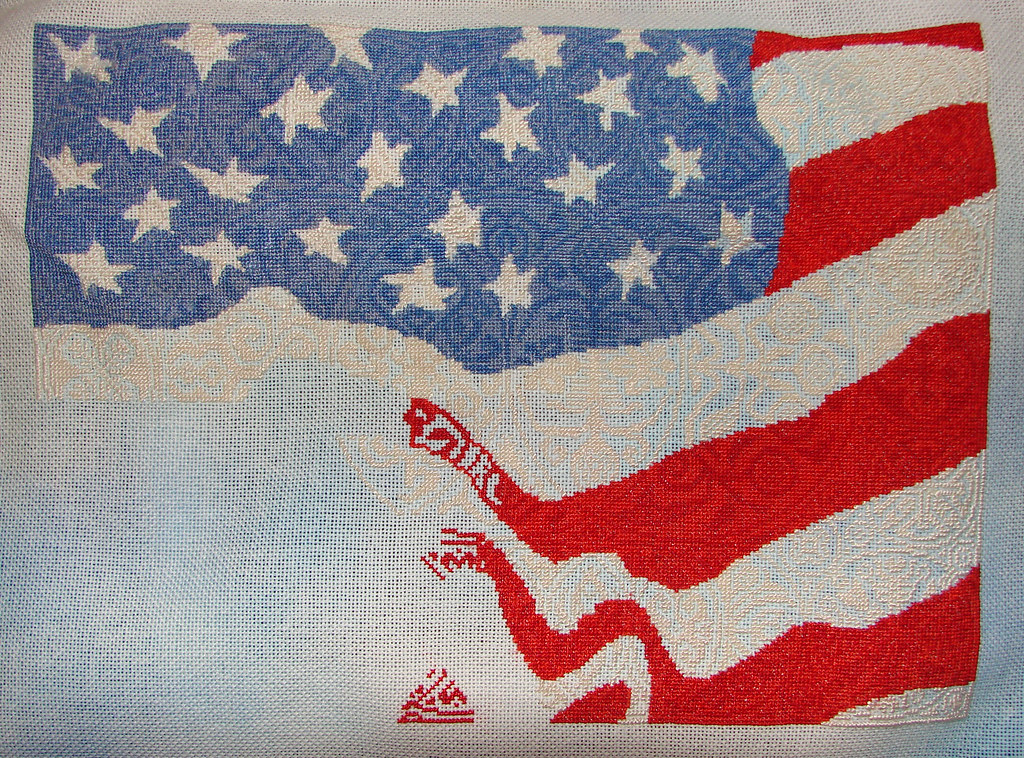
Once I had my lines penciled into the actual pattern, I took out some colored pencils and color-coded my "new" pattern to match my chosen threads (kinda like paint-by-numbers). Then it's just business as usual with the stitching! :) 

It's super-easy to do and kind've a *slaps forehead* D'oh! moment once it's all laid out and explained. *giggles* And, the "technique" can easily be applied to any other cross-stitch/embroidery pattern too! Although I find the InkCircles "Cirques" patterns and their other sampler-type pieces to be the best for expanding creatively since they don't already come with pre-arranged floss colors and give you the freedom to choose your own.

I hope it helps anyone who happens to still be interested. I'm so sorry it took me so long to realize that anyone wanted more information on it.  

Wednesday, February 25, 2009

Squee!

I emailed my finished piece for Tracy to add to the CdC Gallery and instead it's being featured on the front page for awhile!!

Here's the blurb that's written up on the front page:

-----------------

And a special treat, before it's filed away in the Gallery proper. Here is a version of Cirque des Cercles that you don't see everyday:

And you might be asking yourself, "huh?"

I see a flag - She must have the wrong picture up.

I've always encouraged stitchers to take my designs, especially the monochromes, and to make them their own. Whether this is done by picking new and interesting floss/fabric combination or... superimposing an image of a waving flag over the chart and creating a subtle masterpiece like this (well the CdC part is subtle!)

This stunning piece was stitched by Cassie F. with a special frame built by her grandpa out of recycled fence wood. She stitched 2 X 1 on 28 ct Lugana hand-dyed in "Sky" by Sugar Maple Fabrics with Eterna silk floss (2860, 2820, 1690, 1670 and 10.)

So, ask yourself - what would you dream up now if I sent a box of colored pencils in with your order? Take a step to the left and join us outside the box... and send me a photo to share when you are done.

-----------------

I extremely honored and so flattered to be featured so! Hopefully my future pieces can live up to my own hype.

Saturday, February 7, 2009

Framed and ready for display!

Grandpa finished the frame today. It's SOOOOO gorgeous and totally PERFECT! I love it so very much.

It's made with recycled wood fence from around the neighborhood and some store-bought rustic-looking rope. I also wrote up a short note with information on the chart (designer, company, fabric, floss, start/end dates, etc.) and a personal note on where and when I stitched it.

Anywho... enough gushing, here's the frame:


Tuesday, January 20, 2009

Happy Dance!!!

All Done!!!

I would be posting a photo now but my husband has the camera with him and won't be home for another hour or so.

Now I just have to con Grandpa into making a frame for me.....

ETA: Photos!


Wednesday, December 24, 2008

Just some quick update photos. Still working on finishing this beast. With the move back to the States and most of my craft stuff still in Italy, I'll be able to focus more on doing the cross-stitch since it was small enough to fit in my luggage.


And one more without the flash so you guys can see the white bits more clearly.


It is so hard to take a good photo of this piece. :/

Monday, July 7, 2008

One evening, I set my stitching down on the bed and the setting sun coming through the window hit it so prettily I just had to snap a photo.


And here's my finished work to-date.


May need to take a few days off from stitching next week. Brian gave me whatever illness it was he had and I've been paying for it with being tired, headaches, etc. Plus, I'm doing a gift exchange on MAPS and will need to drag out the sewing machine for my partner's gifts sometime soon. I've been trying to get to the Airman's Attic to claim some clothing to recycle but they're not open until Thurs so I may just hit up the local fabric shop for something instead. Anywho... I'll save that story for another blog.

Sunday, July 6, 2008

I've been trying to start up a "rotation" of sorts. I've been stitching on the CDC since Tuesday but didn't get a thing done Wed and Thurs due to shopping (more floss of course) and movie date with the husband. <3 I'll be ending off the CDC on Monday and pick up Black Cat again. Since the HAEDless SAL will start up again on the 18th - 21st, I'm not sure yet if I'll do any stitching on it between Tuesday and Friday... if that makes sense. Since the SAL would sort of throw off the rotation I'm trying to start.... Without the SAL in the works, next up after Black Cat I'd perhaps do a new start on Three Little Maids or Voodoo Boy since they're quick and easy to do. But since I'd like to participate in the SAL to get more of the CDC done, I'll probably be putting off the new start until next Tues - Mon week. Make sense? Meh.

But anyways... I'm completely done with page 3 (technically the first complete page done), a few stitches shy of completing half of page 6 and a bunch of stitches into page 5. I'll post an update photo tomorrow night. Still contemplating the "framing" I want to do. I'm leaning more towards the red/white/blue but the gold would be so snazzy. Hrm... maybe I'll do some test stitching to see which I prefer better. Until tomorrow!

Monday, June 23, 2008

Alllllllmmmmooooossstttt done with page 3!!

I got quite a bit done during this weekend's HAEDless June SAL. To continue with the last blog I am *LOVING* how the reds are looking. Now I'm excited to finish the whole piece and get it framed. I'm thinking of adding a simple border around the edge too. Dunno what yet though. Either a red, white and blue border that continues on a few stitches past the original border to act like a sort of frame... or maybe some golden metallic curlies done in backstitch.... Hrm, I shall have to think on it.

Anywho... I know you'll want to see the photos, so here they are. Pardon the smooshed stitches and wrinkled fabby, I'm putting off ironing it until it's done:


Saturday, June 7, 2008

Whew!! I got so much stitching done today. Almost a full 8 hours. Boy will my shoulders be complaining later... oh well, it was worth it.

The CDC is turning out spectacular! I'm so *in love* with the 1690. It's so bright and beautiful and fabulous. Such a beautiful silk! My original "vision" was to have everything have a subtle look, like at first glance you just see the flag piece but something seems a little "off" about it and you look closer and see the CDC design. In that respect, it's turning out perfect! I'm so happy it's working out so far. I've been so worried that it wouldn't look good together....

I'm very excited to see it finished and framed. I'm contemplating having it framed and matted just like the Patriotic Angel piece with the red/white/blue mattes since they are a rather stunning combination. Since the fabric is also a special hand-dyed SMF (Sky) I will of course want to use it as a matte too.

I know, I know, enough blathering... here's the photos!


Friday, June 6, 2008

Wootles! Tonight I finished the last of the star field. ^_^

In all I think I used a little over 1 skein of the 2860 (Cobalt Blue Medium) as the dark blue and just shy of 2 full skeins of the 2820 (Wedgewood Light). I'm currently working through my second skein of 10 (ecru very light).

Once I've completed the entire project I'll go back and compare how much floss I have left with what I ordered for a more accurate usage.

I'm excited to get started on the reds (1690 -- Carmine Red, 1670 -- Blush Dark) and see how well (or not) they work with the white and blues as well as the pattern as a whole.

I'll be taking the piece with me to work tomorrow and will take some update photos tomorrow night. Hopefully I'll finish up a lot of page 3. I'm thinking it will go faster now that such a large portion of the chart doesn't have the filled in background anymore.

Saturday, May 31, 2008

Inspired by Valerie J.'s CDC at the Ink Circles Gallery I decided to take the idea of coloring in the chart a step further and overlay a waving American flag over the design. I found a photo on the web and drew it out in a grid, coloring in the original pattern with markers.

I then ordered fabric (SMF) and silk floss (Eterna) to start on the piece. I had originally wanted to do a total of 6 colors, both dark and light shades of the colors red, white and blue. Unfortunately the 2nd color of white I picked for the fill-in just didn't stand out at all so I had to rip stitches in a star in the upper-left corner. Since the stitches were too tightly packed I ended up ripping a portion of the fabric. Still not sure how I'm going to fix it.... :(

I continued on and have only recently completed page 2. I'm liking how it's looking so far and think the white not having a contrasting match isn't that bad after all. In a happy mistake, I may have ordered different threads and the white skeins are almost twice as thick as the other colors. As the most updated photo shows, this is causing it to have a small 3D-ish effect that gives it enough contrast to have the original pattern stand out.

I'm praying the piece continues to come out well and perhaps be nice enough to earn a place among the gallery at Ink Circles when it's finished. Wish me luck! I'm also toying with the idea of doing the sister piece, Cirque des Triangles, with a Texas flag for a matching set, but also have another idea up my sleeve... perhaps I'll save that secret for the next Cirque rumored to be on its way. Let's just say if it's a Cirque des Diamonds it'll be PERFECT for what I have in mind.

Anyway, here are the photos!